Going retro with a return to film
I recently bought a new (old) film camera. To be honest the actual camera, an Olympus OM2n, was a bit of a bonus. What I was really after was the lenses. I have an OM to MFT adapter for my OM-D but no lenses to go with it. I got the OM2n, a 50mm f1.8, 28mm f2.8 and 135mm f3.5 for £150 with an OM to NEX adapter thrown in. This is a reassuringly hefty lump of metal and glass for budget modern lens money.
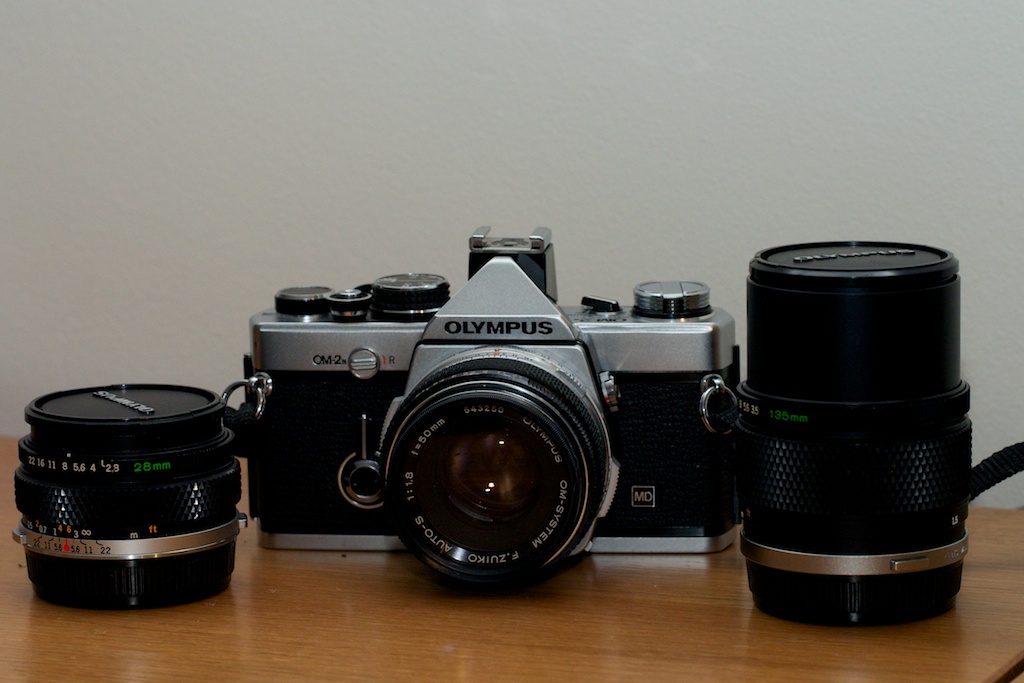 Olympus OM2n with 50mm f1.8, 28mm f2.8 & 135mm f3.5
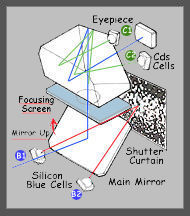 OFT meteringIn the late 70s early 80s when I was just getting into SLRs, it was Pentax and Olympus who dominated the consumer market. When I started a camera club at my school in the 6th form, the weapon of choice was the Pentax ME Super or OM10. If your parents were a bit less generous or your summer job less lucrative you probably had a K1000. When I chose my own camera I was torn as I was moving up from the diminutive Pentax Auto 110 but also had a fondness for my dad's Olympus 35RC rangefinder. My summer job was more lucrative than most, but it was not so good that I could afford an OM2. I am pretty sure I had the big multi page brochure (on paper - how quaint) and would marvel at its Off the Film TTL metering off the film plane . In the end I took the road less travelled and went for the Pentax MX which sat somewhere between the OM1 and OM2 in sophistication. Like the OM1 it was a manual camera but had a more sensitive gallium arsenide meter and LEDs. This was the era of the LED digital watch and your level of coolness was directly related to the number of functions your LED chronometer possessed. I would recommend anyone wanting to learn the fundamentals of photography buy a manual camera. I know auto cameras have manual modes but somehow it's never quite the same.
 OM2n lines up against its contemporary the Pentax MX
OK that's enough nostalgia for the moment, lets get back to owning a film camera in 2013. It dawned on me once I had got to the other end of town that I didn't have any film, at least nothing dated this millennia. I popped into Boots the Chemist to by a roll to test the camera with. The used to have a whole aisle for this kind of thing but now I didn't find any except a few rolls of colour negative film. I wanted to go fully retro and shoot black and white so it was back to the camera shop. Even there the pickings were slim, but I managed to pick a 24exp Ilford FP4.
The following weekend I headed back into town to shot my test roll. I had found the manual online (blissfully short and to the point compared to the OM-D) and was locked and loaded. The camera felt hewn from solid compared to modern cameras and everything seemed to be working. I was a little concerned the metering was a bit optimistic. As this was a test, I decided to stick to aperture priority and not to try and second guess it. This is a very tense act of faith with a film camera.
FP4 is a 125 ISO film and quite fine grained so I was looking for a nice range of tones and good detail. It was close to midday (too much time spent mucking around trying to test the meter) and intermittently sunny. Chester's Tudor style black and white buildings and stone walls are probably as good a place as any for this kind of shoot. I spent most time around the medieval cathedral. I was swapping between the lenses as I needed to test those too.
I was determined not to rush things. With just 24 shots you don't want to screw up too much. Challenge number one is to think only in luminance and not in colour. The second problem is to try and check the whole composition looking for any distracting elements. Then it's down to timing either due to light changes or moving elements. One old chestnut is when to wind on. My muscle memory still wants to whack that winder right after the shot. It's really annoying to have that perfect moment only to find a soggy shutter. However, I did blow a couple of my precious frames accidentally triggering the shutter when changing lenses. One shock after the OM-D was how shaky things were even on a 135mm. Obviously running on caffeine rich blood is not the preparation to retro photography. I was rather pleased that I resisted the reflex look at the back of the screen after a shot. Also focus is really easy with the old split screen, even if the ground glass element makes things look a little murky after the 5D. All too soon I felt that tension in the winder that says no more shots so I dropped them in at the lab. I asked for 5x7 prints so I would have a bigger print to scan and then it was back home.
It's been a long time since I have had that anticipation of going to pick up a set of prints. The tension of whether that shot you thought you nailed was nailed or more screwed. As usual, it was a mixed bag. The first good news was the OM2n is still a better judge of exposure than I am, so they had at least come out. A few I even liked. Many of the cathedral shots looked a bit flat. I think this is because hundreds of years of weathering has left the stone quite dark. The machine prints from the lab use an auto exposure which tries to turn the stone mid grey removes a lot of the image contrast. This is why I always preferred transparencies. Unless you get your prints handmade, it's the best way to get what you intended.
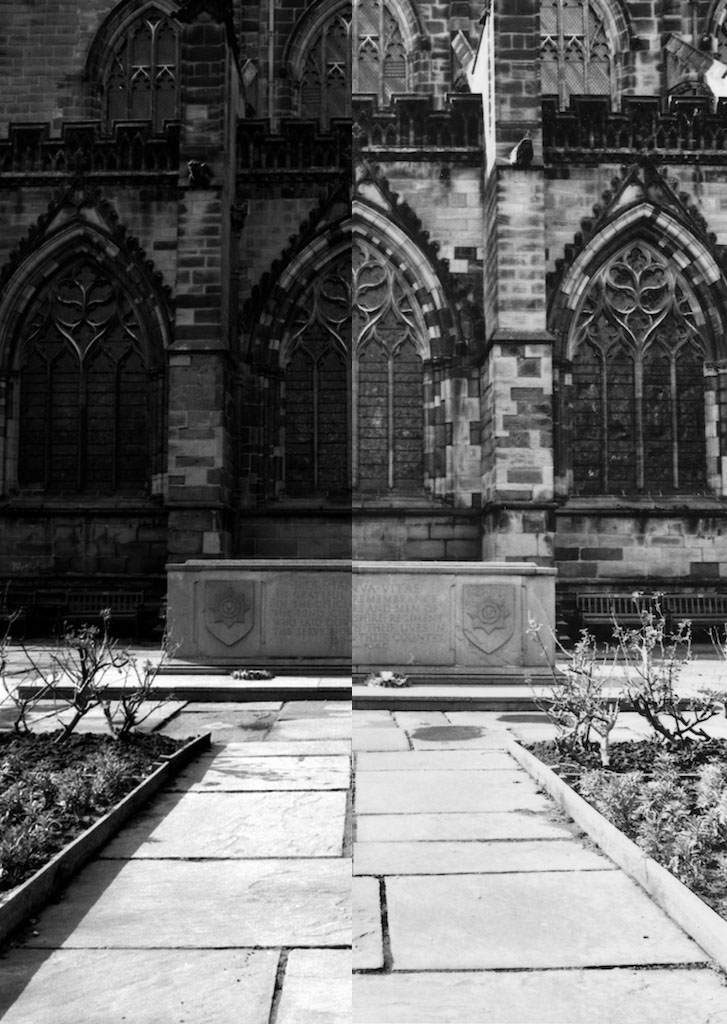 Negative scan left, print scan right
I felt I needed to verify my suspicions about the prints but how? Remember, negatives are a bit tricky to judge as they are small and, well, negative. My local lab doesn't have a scanner so I decided to try myself. I only have a multi-function printer for scanning but it was, in its day, Canon all-singing-all-dancing model the MP990. This has a film scanner mode which I have never used despite it being a big draw to this model when I bought it. Turns out, scanning is tedious - who knew? However, it did work a lot better than expected. The scanner offers 1200, 2400 and 4800dpi which works out at a 2, 7 or 30MP file. Scanning time varies from 3 minutes for a set of 4 at 1200 up to 14mins at 4800. The scanner automatically spots the images and makes them positives. It also seems to make a much better job of judging the exposure than the lab's printer does or it's gots it default well set. I am generally much happier with the scans than I am with the prints.
Link to the scanned image gallery
Now you can do your normal digital adjustments. Is it as flexible as conversion from a colour raw file? No, you don't have as much flexibility. I tend to use digital filters in my conversions but you can do that with a mono scan, there is no colour to "bend". You can see the grain but I would regard that as being an artistic choice. I have some plugins which simulate film grain so it will be interesting to see how simulated FP4 compares to the real deal. I have a roll of faster, grainier HP5 and some Velvia 50 tranny stock to try too at some point.
All-in-all, I am happy with my film experiment. Using (and paying) for film again does remind you just why digital is the future. It's very expensive and your control over the end result is limited unless you are or know a good printer or own a decent scanner. However, the tactile pleasure of an OM2 or the unique character of FP4 serve to remind us what we have lost in the pursuit of progress.
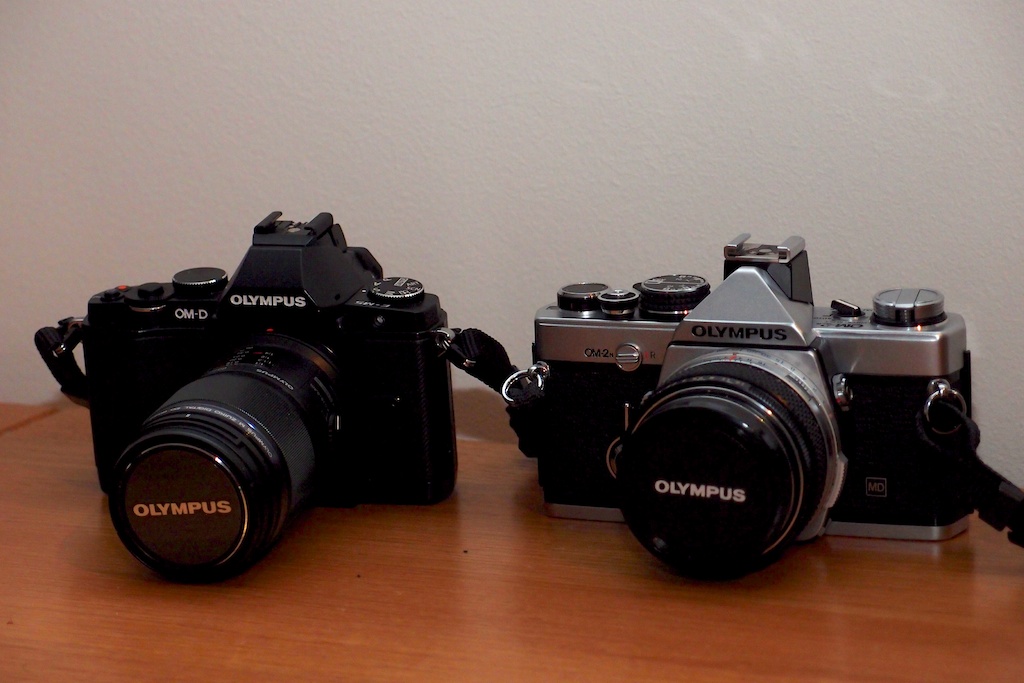 OM2n with its descendant the OM-D E-M5
 Andrew Howe
Reader Comments